You must create a new debtor label batch manually. A label batch can contain labels for one or multiple debtors.
To create a new debtor label batch:
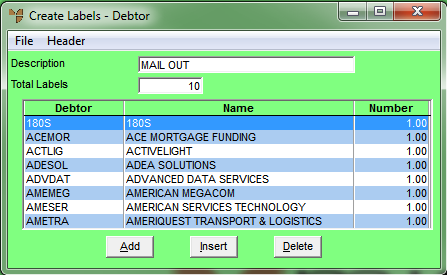
Micronet displays the Create Labels - Debtor screen.
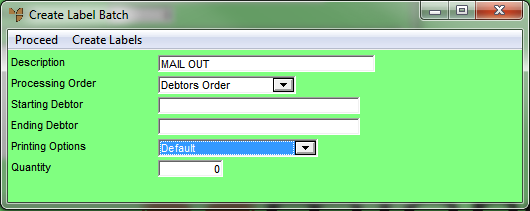
Micronet displays the Create Label Batch screen.
|
|
Field |
Value |
|
|
Description |
Micronet displays the batch description you entered on the Create Labels - Debtor screen. |
|
|
Processing Order |
Select the order in which you want the labels printed:
|
|
|
Starting / Ending Debtor |
Enter the debtor numbers of the first and last debtors you want to include in the label batch. |
|
|

|
Technical Tip If you want to add debtors manually, leave the Starting Debtor and Ending Debtor fields blank. |
|
|
Printing Options |
Select the print format for the labels:
The standard selection in this field is “Default”. |
|
|
Quantity |
Enter the number of labels you want printed for each debtor in the label batch. |
Micronet compiles a list of debtors and the number of labels to be printed for each debtor.
Micronet redisplays the Create Labels - Debtor screen showing all the debtors in the batch along with the number of labels to be printed. The Total Labels field displays the total number of labels in the batch.
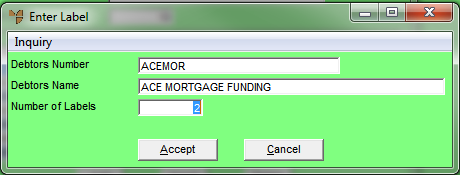
Micronet displays the Enter Label screen.
Micronet redisplays the Create Labels - Debtor screen.
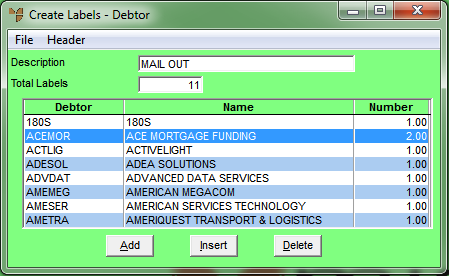
You can now print, save or delete the label batch.
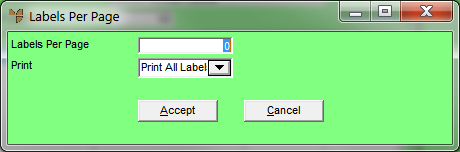
Micronet displays the Labels Per Page screen.
|
|
Field |
Value |
|
|
Labels Per Page |
Enter the number of labels you want printed on each page. |
|
|
|
Select how you want the labels printed:
|
|
|
|
Technical Tip If printing to a Monarch printer, simply select Accept on this screen. |
Micronet displays the Select Report screen with a list of label layout options created in the Report Generator.
Micronet displays the Select Output Device screen.
|
|
|
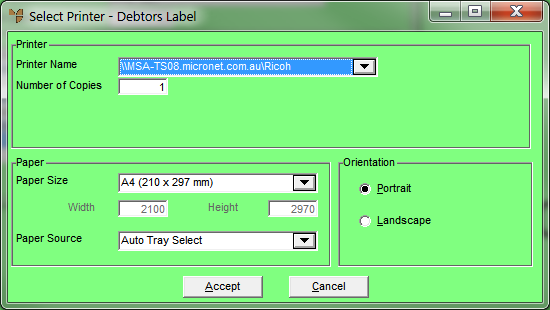
Technical Tip If you selected Default in the Printing Options field on the Create Label Batch screen, Micronet displays the Select Printer screen.
|
Micronet displays a message asking if you have finished printing these labels.
|
|
|
Warning If you want to print the label batch again, you must select No. Micronet redisplays the Create Labels - Debtor screen showing the batch details. Make sure you save your changes before exiting. |
If you select Yes, Micronet deletes the label batch and redisplays the Create Labels - Debtor screen with the batch removed.